So I decided to make a do-it-yourself, short-cut trimming tool.
The situation is this: You've got a lot of trimming to do on a hefty pot. You feel it up, "collecting information" about it (as my high school pottery teacher, the esteemed Alicia Sumner, would say). You flip it over, center and press it to the bat with little chunks of clay. You trim a while, get nervous that you're going to break through the bottom, pick it up, feel it up, put it down, reposition the clay chunks, start trimming again, get nervous....and on it goes. For hours.
You could cheat and use the Giffin Grip. But I find that to be just as annoying as the clay chunk method.
Your alternative? No clay chunks, just winging it with a sole finger pressing the center of the base to keep the pot from flying across the studio. Every now and then, your finger catches the pot off-center and it swings out to collide with the splash pan. Only for the daredevils.
Well, this little tool can make conscientious potters accelerate their turning. It works by providing friction for the side that grips the base of the pot and no friction for the side you press down with your fingers. That way, you can pin the pot to the bat without the friction between your finger and the base interfering.
Making one is so simple I'm embarrassed even to offer photos. But here it is, in three insultingly easy steps.
Step 1

Assemble your materials, all of which you can find around the house. 1) A piece of cloth. I was taught to use felt, but really anything that has some good texture will do. I used an old dish rag. 2) A metal jar lid. You want it to be medium sized and to have fairly short sides. That of a spaghetti sauce jar -- like the one pictured here - works great. You'll probably want to wash it. 3) A good glue. I used Super Glue, but I've also used a glue gun successfully. 4) Scissors.
Step 2
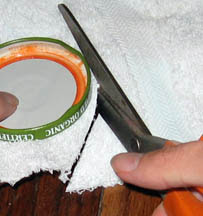

Cut out a piece of the cloth that looks something like the shape of the lid.
Step 3
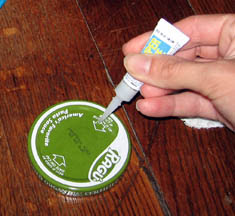
Glue!
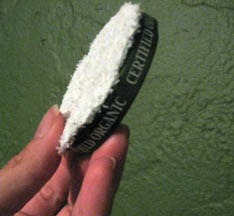
You're done! Wasn't that easy?
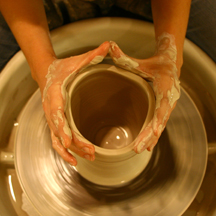
You're ready to go to work with your new tool. And if this doesn't suit your fancy, I also highly recommend using a foam bat, which puts the friction on the rim of the pot. A bonus: The rings on this bat make it really easy to center. Emily Murphy, a Chicago potter and blogger, has a great how-to on making this tool.

Glue!
You're done! Wasn't that easy?

You're ready to go to work with your new tool. And if this doesn't suit your fancy, I also highly recommend using a foam bat, which puts the friction on the rim of the pot. A bonus: The rings on this bat make it really easy to center. Emily Murphy, a Chicago potter and blogger, has a great how-to on making this tool.
No comments:
Post a Comment