I know, I know. It's hot as hell outside. But these bright blue skies have got me thinking about fall and the storage vessels, mugs and soup bowls that come with the cool weather.
In the lidded vessels class Mary Ann is teaching, students are learning to make soup bowls with handles and lids. Not only are they functional and perfect for the cold weather, but they're cute as hell! Lynne pointed out that they'll take up more cabinet space, but you can design them to stack pretty well if you put the handle on high up, like this.
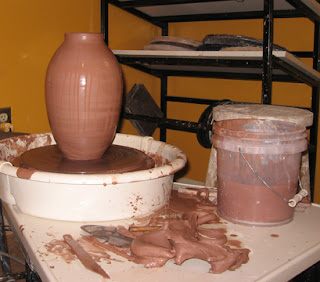
This week I continued with my megalomania, throwing this monstrosity and thinking all the while of famous cases of the disease: Icarus, the Tower of Babel, and Lucifer. When you've pulled all the way to the top, and you're wondering if a shaky hand is going to throw a wobble into the pot, it's easy to see the connection. But throwing big is addicting and I'm likely to keep it up until the cost of clay becomes overwhelming.
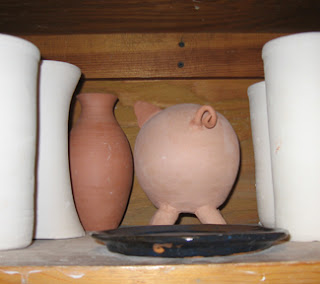
I also realized that the first two glorious weeks of the semester are gone. Why so nostalgic? Well, leisure courses have started, which has cut out about 2/3 of the free studio time at the ACC. Also, my first batch of pots is out of the bisque firing. That means it's time for the dreaded glazing phase. I better start doing some test tiles if I want my preciouses to come out anything other than poop brown. Herb came out of the oven, and his bum looked so adorable I had to take a photo.
On the bright side, less studio time means more outdoor time. Enjoy this gorgeous weather!
Saturday, September 22, 2007
Thursday, September 13, 2007
Megalomania
Last week I was thinking big. Although I usually try to stick to basic functional forms (vases, bowls and mugs) last week I hunted the white elephant of ceramics - large vessels. They are, figuratively and literally, burdensome: difficult to throw, not terribly functional and heavy. But every potter knows they're the hardest form to do, so we throw ourselves into the task, griping as we go along.
My greatest challenge in making the following forms was fighting with the new clay that the ACC sells. In high school, I was spoiled by having a clay mixer that my tenacious instructor acquired. Not only was the clay cheaper, but it was also more plastic, a must for throwing big pots. Of course, plasticity is always important in throwing, but you'll find yourself much more sensitive when you're trying to move up 10 pounds of clay.
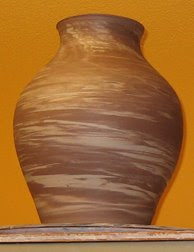
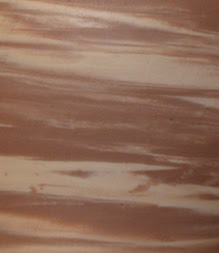
Another pottery type I tackled last week was agateware. Inspired by the agate stone, this is a technique in which you use two or more colors of clay to allow the natural rhythm of the spinning wheel twist its own pattern in the clay. It's easier to show you what I mean.
Many potters create their two colors of clay by using a base white and adding colored slip to it, but I usually take the simple route and use the colors of clay available in the ACC -- red, white and brown. There's a lot of variety available even with just two colors, depending on how much you wedge the clay. If you take two equal pieces of clay, slap them together and throw, you'll have much larger, bolder and more contrasted patterns. If you wedge the two colors for a while, being careful not to actually blend them, you'll have a much more stratified effect, like in the one I threw. I love agateware because you can study the patterns and see how the clay moved as you threw the pot. It's almost like a record of the pot's birth.
Saturday, September 8, 2007
in internet exile
No thanks to Florida football, the Arts & Crafts Center has been closed the last two Saturdays for home games. That's left me with a jonesing for clay between my fingers. And where do you go when reality just won't cut it? Why, the World Wide Web, of course.
There are tremendous resources for potters online. Like lots of niche communities, this one has thrived by sharing specialized knowledge across many borders.
I hope to update you on some of these resources throughout these few months. To start, I figured we'd go with the big picture: the world. I've been watching YouTube videos of potters doing their thing and let me tell you: in education as in pottery, the Japanese have got us beat. Don't believe me? Watch this:
And this:
If you can generalize from two videos of Japanese potters, I'd like to note a few things I thought were interesting. One, they throw on Shimpo wheels known for their whisper-quiet motors and which, I've just learned, are products of a Japanese company. Both potters throw off the hump and directly on the wheel head, a practice I have come to envy after fighting with wobbly bats for the last two weeks. I also learned from a little Internet perusing that throwing off the hump is more common in Eastern cultures than Western, which places more emphasis on individual designs, rather than limited design and mass production. The potters do an interesting trick when coning down of twisting the cone to the side. I haven't figured that one out.
Here's a video from Vietnam.
In China, pottery is an ancient art developed from the rich ceramic resources there. Dishware in England became known as China, my high school history teacher told me, because of China's preeminent ceramics. Prized was its white porcelain with blue decoration. You can read more about that here.
Here's an interesting glimpse of how it was in the day. An Indian potter using a primitive wheel. and we thought kick wheels were a lot of work!
Another trick I've picked up from watching potters on YouTube is to coat the bat with a little bit of clay before you throw your clay ball onto it. That helps it stick.
So maybe I do have Florida football to thank. I wouldn't have learned these tricks from the masters without being forced from the studio.
Thursday, September 6, 2007
hallowed spheres of clay
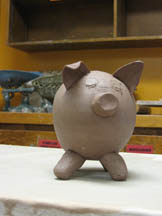
This week I've been experimenting with enclosed forms. It's just like throwing a pot, but you collar in until the tiny hole in the top blinks out and you've got a sealed shape. I started with a sphere to make into a piggy bank. I left quite a bit of clay at the base so that I could trim around its curvy bottom.
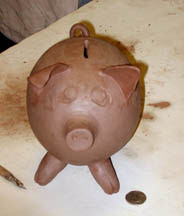
Once it was leather hard, I squished it a little to make the shape more blimp- or pig-like. Then I scratched and attached some feet, a snout, ears and a cute curly tail. Carved in some slightly sad eyes. At the suggestion of fellow potter Lynn, I christened him. Herb will soon be having the first experience to sadden those swine eyes: He'll be heading into a 2,000-degree kiln. Real pigs have gone worse places, I suppose.
Introducing Herb, in first draft and after the first edit.
In case you're concerned, Herb is equipped with a hole in the bottom to extract the coins without smashing his piggy little self.
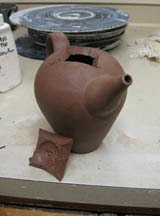
The next enclosed form I made was a teapot. This one was inspired by Mary Ann Bonner, the studio potter best loved for being a beam of sunshine in a windowless basement. She showed me a "silly" teapot of hers (still have to ask her why it was "silly") that was an enclosed form. The advantage of this is that you can carve out a lid just like you'd carve one for a Jack-O-Lantern. Not only is it easier than throwing a trimming a lid to fit, but you can make it any shape you want! Usually, throwing confines you to circular shapes.
I probably would have done a circular lid had it not been for that realization. So I went a little wild and carved out what I can only describe as a square with curves. See for yourself.
how to make a short-cut trimming tool
I can't peel my mind off a big beautiful bowl I threw earlier this week. Oh, the curves, the smoothness, the soft, supple body. You should never get attached to your pots in the surprising and sometimes disappointing world of ceramics, but this one's captured my heart. It's going to require a special trim.
So I decided to make a do-it-yourself, short-cut trimming tool.
The situation is this: You've got a lot of trimming to do on a hefty pot. You feel it up, "collecting information" about it (as my high school pottery teacher, the esteemed Alicia Sumner, would say). You flip it over, center and press it to the bat with little chunks of clay. You trim a while, get nervous that you're going to break through the bottom, pick it up, feel it up, put it down, reposition the clay chunks, start trimming again, get nervous....and on it goes. For hours.
You could cheat and use the Giffin Grip. But I find that to be just as annoying as the clay chunk method.
Your alternative? No clay chunks, just winging it with a sole finger pressing the center of the base to keep the pot from flying across the studio. Every now and then, your finger catches the pot off-center and it swings out to collide with the splash pan. Only for the daredevils.
Well, this little tool can make conscientious potters accelerate their turning. It works by providing friction for the side that grips the base of the pot and no friction for the side you press down with your fingers. That way, you can pin the pot to the bat without the friction between your finger and the base interfering.
Making one is so simple I'm embarrassed even to offer photos. But here it is, in three insultingly easy steps.
Assemble your materials, all of which you can find around the house. 1) A piece of cloth. I was taught to use felt, but really anything that has some good texture will do. I used an old dish rag. 2) A metal jar lid. You want it to be medium sized and to have fairly short sides. That of a spaghetti sauce jar -- like the one pictured here - works great. You'll probably want to wash it. 3) A good glue. I used Super Glue, but I've also used a glue gun successfully. 4) Scissors.
So I decided to make a do-it-yourself, short-cut trimming tool.
The situation is this: You've got a lot of trimming to do on a hefty pot. You feel it up, "collecting information" about it (as my high school pottery teacher, the esteemed Alicia Sumner, would say). You flip it over, center and press it to the bat with little chunks of clay. You trim a while, get nervous that you're going to break through the bottom, pick it up, feel it up, put it down, reposition the clay chunks, start trimming again, get nervous....and on it goes. For hours.
You could cheat and use the Giffin Grip. But I find that to be just as annoying as the clay chunk method.
Your alternative? No clay chunks, just winging it with a sole finger pressing the center of the base to keep the pot from flying across the studio. Every now and then, your finger catches the pot off-center and it swings out to collide with the splash pan. Only for the daredevils.
Well, this little tool can make conscientious potters accelerate their turning. It works by providing friction for the side that grips the base of the pot and no friction for the side you press down with your fingers. That way, you can pin the pot to the bat without the friction between your finger and the base interfering.
Making one is so simple I'm embarrassed even to offer photos. But here it is, in three insultingly easy steps.
Step 1
Assemble your materials, all of which you can find around the house. 1) A piece of cloth. I was taught to use felt, but really anything that has some good texture will do. I used an old dish rag. 2) A metal jar lid. You want it to be medium sized and to have fairly short sides. That of a spaghetti sauce jar -- like the one pictured here - works great. You'll probably want to wash it. 3) A good glue. I used Super Glue, but I've also used a glue gun successfully. 4) Scissors.
Step 2
Cut out a piece of the cloth that looks something like the shape of the lid.
Step 3
Glue!
You're done! Wasn't that easy?
You're ready to go to work with your new tool. And if this doesn't suit your fancy, I also highly recommend using a foam bat, which puts the friction on the rim of the pot. A bonus: The rings on this bat make it really easy to center. Emily Murphy, a Chicago potter and blogger, has a great how-to on making this tool.
Sunday, September 2, 2007
an introduction
Ever since I started throwing as a junior in high school, my pottery teachers have told me to keep a glaze journal. That way, instead of whining about this necessary evil, I could learn from my mistakes and make the process less painful. I never kept that journal religiously. This time, I'm really going to do it -- online. I swear.
There will be other stuff. I'm exploring the online network of potters and finding it inspirational and educational. I'll link to sites and blogs I find helpful and hope that you find them that way, too.
If, by any slim chance, I have readers, feel free to write me or leave comments with your own thoughts and experiences.
This semester my goal is to go beyond the mass-production style I adopted in the spring to practice techniques I've learned, but rarely use. I'm thinking of sgraffito, underglazes, slip, altered pots, agate ware, piercing and carving.
Of course, there will be pictures. And fun!
Subscribe to:
Posts (Atom)