I had a frustrating Friday evening in the pottery studio. The two worst enemies of the potter were striking me at once! I suppose from the title of this post that you can guess the culprits.
The wobbly bat is a constant annoyance to the potter. It usually accompanies any attempt to use the common black bats, which look like this:
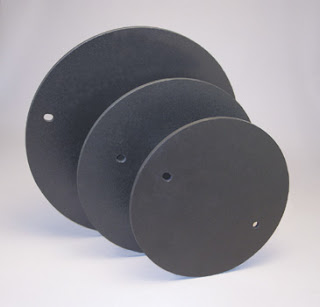
The problem is that these holes get worn out and larger to the point where they don't fit the wheel pins any more. Then as you're putting pressure on one side of the form, it, well, wobbles, keeping you from centering the pot and making any progress on it. The wobbly bat sounds like this - thump, thump, thump, thump, thump, thump - until you're crazy with irritation!
Now, what is the solution to this constant problem?
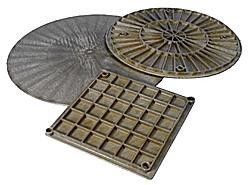
Paper towels. Stop what you're doing, get up, get some bits of paper towel, and cover the wheel pins with them. Then put the bat back on, and hopefully the paper will have tightened hole around the pin. Another solution is to try a different kind of bat, which I usually have more success with. This type looks like this:
On to the hard clay. I splurged on a bag of fresh clay last night (as opposed to the stuff you recycle from the slip buckets and trimmings) and it was hard as a rock! I almost killed my hand trying to cone up and down. I returned the clay, but if you don't have that option, well, you might as well give up on throwing for the night. That's because there's no really good way to soften clay without some good old-fashioned time.
One trick I do is cutting out a smallish piece (maybe a pound) and wedging it together with some throwing scraps that are too wet. But if you don't have any too-wet clay, your best option is to cut the clay up into even smaller pieces (a quarter to a half a pound), put them in a bag and spray the hell out of them with water. Then let them sit for a day and wedge them back together.
Saturday, November 17, 2007
Thursday, November 1, 2007
The secrets of glazing (unfortunately, not the sugary kind)
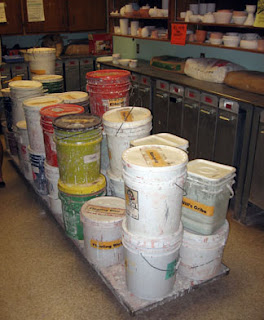
The other day a new ACC member was ready to glaze, and he faced a dizzying glut of options, all of which were new to him. It looked something like this:
Daunting, I know. The first thing to know about glazes is that they're not paint. Underglazes, popular with paint-a-pot places like DoArt and The Studio, are the thing to use if you want what-you-see-is-what-you-get color and a glaze that won't run or combine with other glazes in surprising ways.
True glazes are much less predictable. They're made up of three basic ingredients: silica, or glass; modifiers, which adjust when the glaze will melt; and chemicals that give the pot color.
They can be applied in many ways, the most popular of which is airbrushing, because it covers the pot evenly and allows two glazes to blend nicely. Other options are dipping, brushing and pouring.
Some hazards of glazing, of which there are many: If the glaze is too thick, it will crawl. Sometimes this is the desired effect, as in this photo of a crawl glaze. But if it's not your intention, you'll be disappointed when your glaze is bumpy and not food safe. Before firing your glazed pot, you must make sure that you've dry footed (I like to think of this as wiping the pot's bottom, like you would a baby). Your pot should be glaze-free anywhere it will touch the kiln shelf, and you should leave a little extra room above where it meets the kiln shelf to protect yourself from runny glazes. If you don't do this, your pot and the kiln shelf will be joined for all eternity. Another hazard: ugly glaze combinations. Don't couple two of your favorite glazes on a favorite pot. You never know how they'll turn out. This is where your studio community will come in, with popular, well-tried glaze combos. Some of the favorites in our studio are Seafoam over Plum Base, White over Ebony and Lydia Yellow over Floating Blue. If you're trying something new, be sure to try it on a test tile.
Finally, to show how different the glaze is before firing and after, I have some photos for you. Nothing like paint!
Subscribe to:
Posts (Atom)